Furniture Wrap Cost Calculator
Calculate Your Project Cost
Cost Comparison
Estimated costs for your project based on square feet
| Method | Material Cost | Estimated Total Cost | Duration | Notes |
|---|---|---|---|---|
| Car Wrap Vinyl | 3-5 years durability indoors | |||
| Slipcover | 1-2 years, easy to replace | |||
| Paint | 5-10 years with proper sealant | |||
| Contact Paper | 1-2 years, not UV protected |
Quick Takeaways
- Car‑wrap vinyl can be used on most solid‑surface furniture, but preparation is critical.
- Expect a durable, water‑resistant finish that lasts 3‑5 years with proper care.
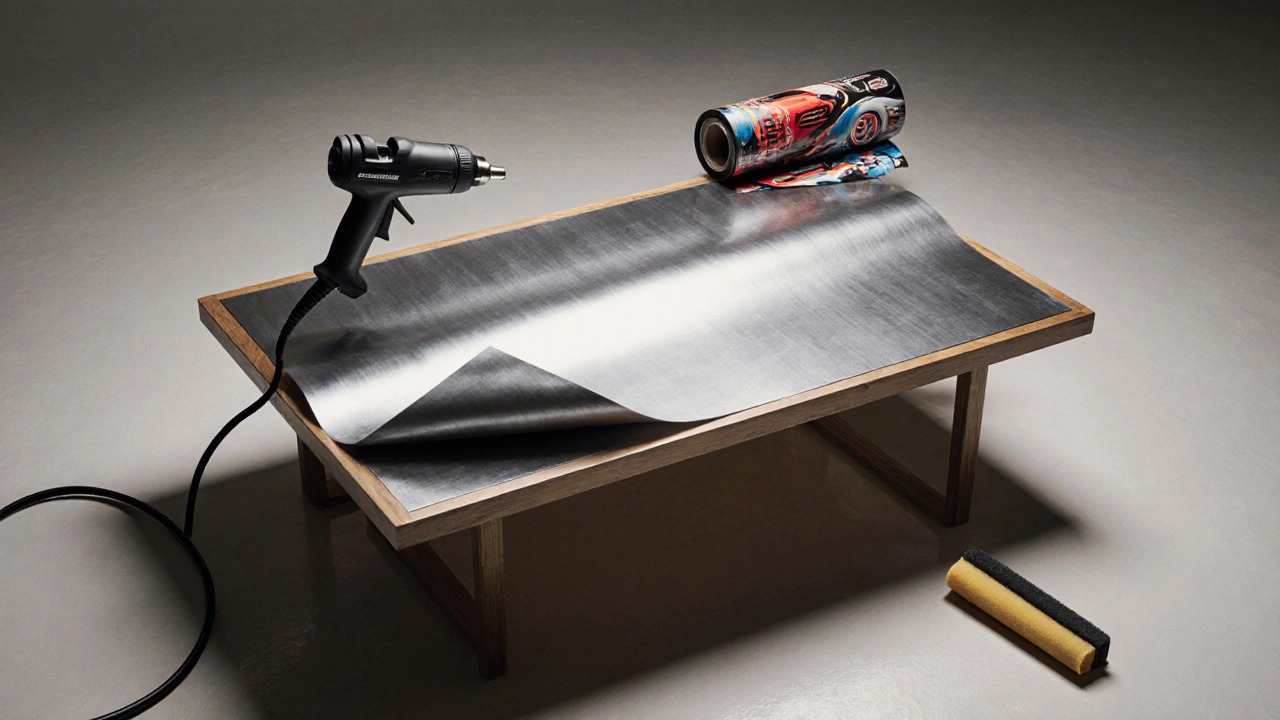
- A heat gun, squeegee, and a clean, smooth surface are the minimum tools you’ll need.
- Complex curves or upholstery require professional help or alternative solutions.
- Cost per square foot is usually higher than fabric slipcovers but lower than a full paint job.
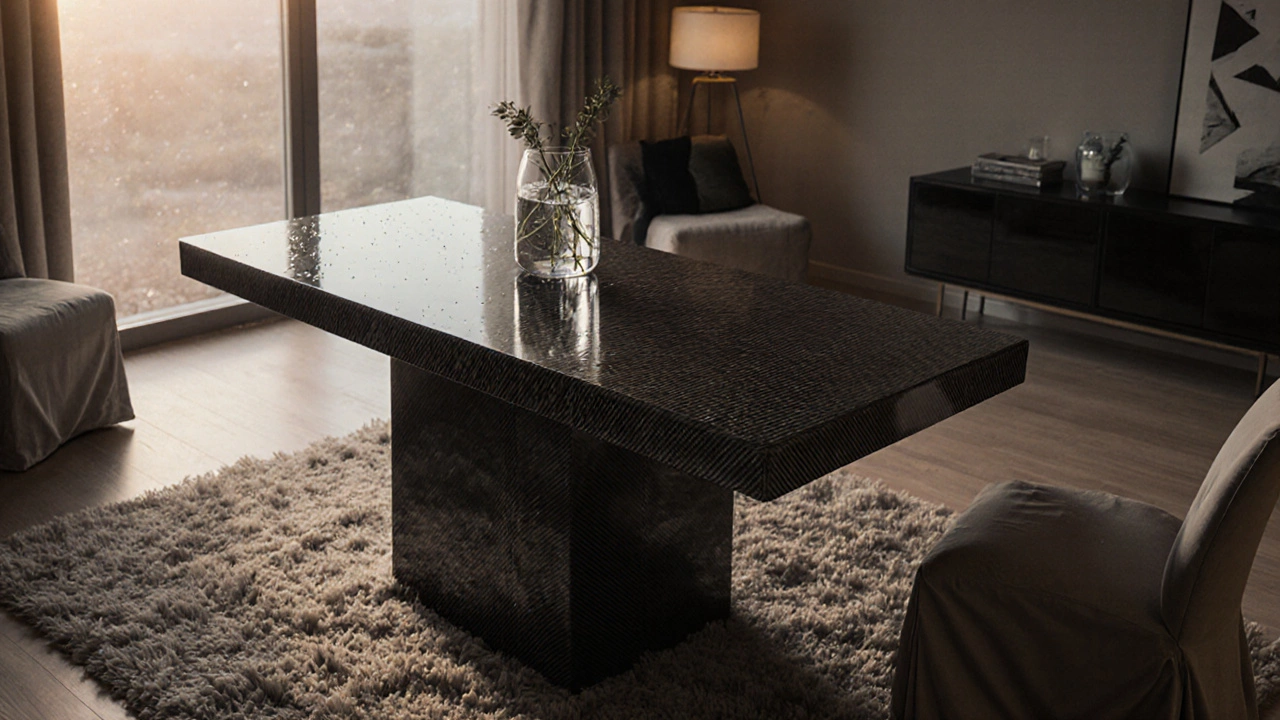
Ever looked at a sleek vehicle wrap and thought, "That would look amazing on my coffee table"? You’re not alone. The short answer is yes-you can wrap furniture with car wrap, but it’s not a plug‑and‑play project. Below we break down what car‑wrap vinyl is, why it can be a great (or risky) choice for furniture, and exactly how to do it yourself without turning your living room into a workshop disaster.
Car wrap is a high‑gloss, thin vinyl film originally designed to cover vehicle exteriors for branding or aesthetic purposes. It comes in rolls, typically 1.5m wide, and features a pressure‑sensitive adhesive that bonds when heat is applied. The same properties that let it hug a car’s curves also make it attractive for DIY furniture projects.
What Is Car‑Wrap Vinyl and How Does It Work?
The core of a car‑wrap system is Vinyl wrap a flexible polymer sheet with a self‑adhesive backing that activates with heat. When you press the film onto a surface and run a heat gun over it, the adhesive becomes tacky, allowing you to smooth out bubbles and conform to contours. Once cooled, the bond solidifies, creating a semi‑permanent, water‑resistant coating.
Key attributes that matter for furniture:
- Thickness: 2‑3 mils (0.05‑0.08mm) is common; thicker films add durability but can be harder to stretch over tight corners.
- Finish: Glossy, matte, metallic, or carbon‑fiber prints are available. Choose based on the look you want and the type of furniture.
- UV resistance: Most automotive films are UV‑protected, which helps prevent fading on exposed indoor pieces.
Is Car‑Wrap Vinyl Suitable for Furniture? Pros and Cons
Before you rush to the nearest wrap supplier, weigh the advantages against the drawbacks.
Pros
- Durability Vinyl can resist scratches, spills, and light abrasions better than paint.
- Easy to clean - a damp cloth removes dust, and the surface is non‑porous.
- Customizable - you can order a print that mimics wood grain, leather, or bold graphics.
- Temporary - if you ever want to revert, the film can be peeled off without damaging the underlying finish (provided the original surface was properly prepared).
Cons
- Complex shapes (e.g., carved legs) may need professional heat‑forming tools.
- Adhesive can pull paint or veneer if the furniture’s finish is old or poorly bonded.
- Installation is time‑consuming; one large piece can take several hours.
- Cost per square foot can be higher than fabric slipcovers, especially for specialty prints.
Preparing Furniture for Vinyl Wrap
Preparation is half the battle. Skipping any step often leads to bubbles, peeling, or a rip‑off finish.
- Clean the surface. Use a mild detergent and a lint‑free cloth to remove dust, grease, and wax. For glossy paints, lightly sand with 320‑grit paper to create a “tooth” that helps the adhesive grip.
- Repair imperfections. Fill dents or scratches with wood filler or epoxy, then sand smooth. The wrap will magnify any flaws.
- Mask off non‑wrap areas. Tape off legs, hardware, or glass surfaces you don’t want to cover. Adhesive the pressure‑sensitive glue on the back of the vinyl will bond instantly, so protect anything you can’t wrap.
- Measure and cut. Unroll the film, lay it flat, and cut a generous piece (add 5‑10cm on each side). Use a sharp utility knife for clean edges.
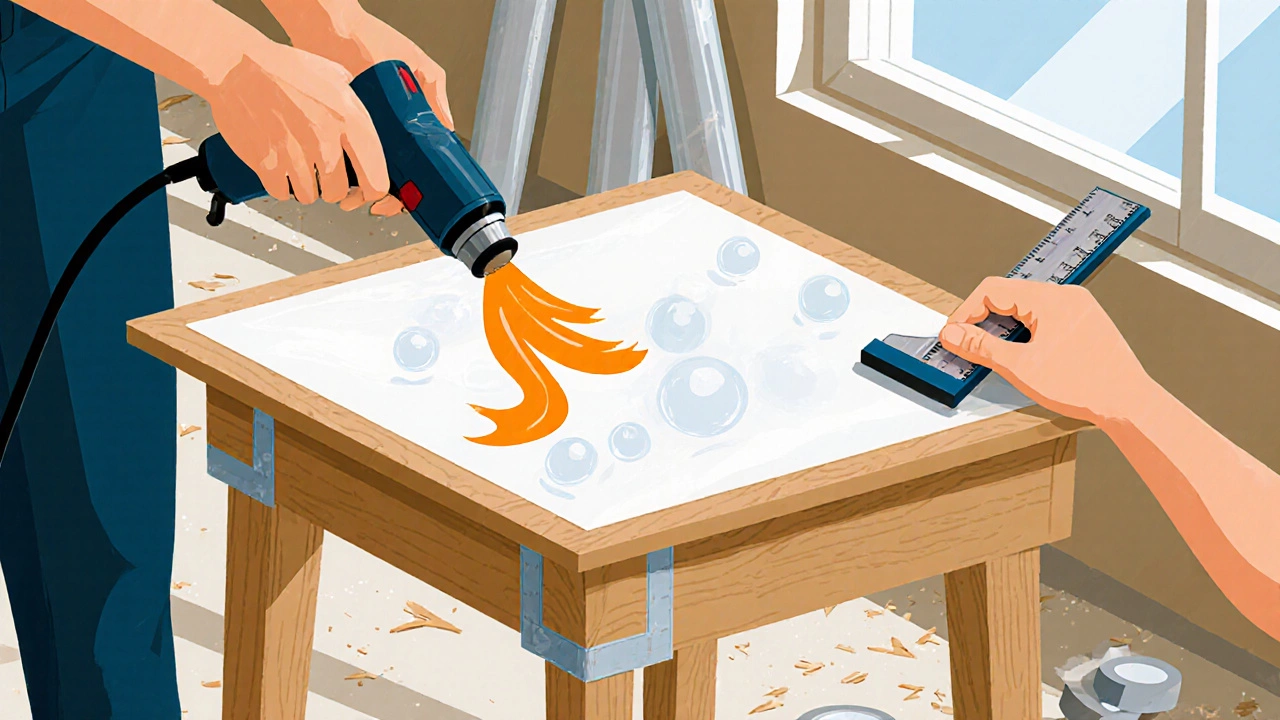
Make sure your workspace is well‑ventilated and free of drafts, which can cause the film to stick unevenly.
Applying Car‑Wrap Vinyl to Furniture: Step‑by‑Step
- Position the film. Align the cut piece with the furniture, allowing a little overhang. Press lightly with your hand to make sure the orientation is right.
- Secure with masking tape. Lightly tape the corners to hold the film in place while you work.
- Heat the film. Using a Heat gun a handheld tool that emits controlled hot air for shaping adhesives, glide over the surface at 120‑150°C. Start from the center and work outward. The heat makes the adhesive pliable.
- Smooth out bubbles. With a squeegee (a flat plastic or rubber scraper), push air bubbles toward the edges. Keep the squeegee at a shallow angle (about 30°) to avoid tearing the film.
- Trim excess. Once the film adheres fully, cut the overhang with a razor blade, slicing at a 45° angle for a clean finish.
- Seal edges. Run the heat gun along the trimmed edges for a few seconds to ensure the adhesive seals completely.
- Cool and inspect. Let the piece sit for at least 30minutes before handling heavily. Check for any remaining bubbles; a quick re‑heat and squeegee pass usually fixes them.
Tip: For large surfaces like a dining table, work in sections (e.g., one quadrant at a time) to keep the film from cooling before you can smooth it out.
Common Mistakes & How to Avoid Them
- Skipping surface prep. Even a thin layer of dust will cause the film to peel. Always clean and, if needed, sand.
- Applying in a cold room. Low temperatures reduce adhesive activation. Aim for 20‑25°C ambient.
- Using too much heat. Over‑heating can melt the film, creating a tacky mess. Keep the gun moving.
- Stretching the film too far. Vinyl has limited elasticity. Cut a larger piece instead of pulling it tight.
- Neglecting edge sealing. Unsealed edges will peel over time, especially on high‑traffic furniture.
Alternatives to Car‑Wrap Vinyl
If the wrap process sounds too involved, here are a few practical alternatives.
- Slipcover a removable fabric cover designed to protect or style furniture - Ideal for sofas and chairs, low‑cost, and easy to wash.
- Paint - A high‑quality enamel or chalk paint can give a permanent finish, but it’s permanent and harder to change.
- Contact paper - Thinner and cheaper than automotive vinyl, but less durable and not UV‑protected.
- Self‑adhesive veneer sheets - Offer a wood‑grain look with a thin, glue‑backed layer, good for small panels.
Cost & Durability Overview
| Option | Typical Cost (CAD) | Durability (Years) | Installation Difficulty | Customizable Designs |
|---|---|---|---|---|
| Car‑wrap vinyl | $12‑$20 per sqft | 3‑5 (indoors) | Medium‑High | Full‑color prints, matte/gloss/metallic |
| Slipcover | $30‑$150 per piece | 1‑2 (fabric wear) | Low | Limited to fabric patterns |
| Paint | $5‑$10 per sqft (plus labor) | 5‑10 (properly sealed) | Medium | Solid colors, limited texture |
| Contact paper | $3‑$7 per sqft | 1‑2 (prone to tearing) | Low‑Medium | Basic patterns, no UV protection |
When you weigh the numbers, car‑wrap vinyl sits in the mid‑range for cost but offers the longest lifespan among non‑paint options, provided you follow the prep and installation steps.
Frequently Asked Questions
Can I use any car‑wrap film on furniture?
Most automotive vinyl works, but look for a product labeled “calendered” or “cast” with a thickness of 2‑3mil. Cast films stretch more and are better for curves, while calendered films are cheaper but less flexible.
Will the wrap damage my existing paint?
If the paint is firmly bonded and you’ve sanded a light “tooth,” the adhesive should release cleanly. Old, flaking paint can be pulled up, so always test a small hidden area first.
How do I clean a wrapped piece?
A soft, damp microfiber cloth is enough for everyday dust. For sticky spills, use a mild soap solution, rinse with clean water, and dry quickly. Avoid abrasive cleaners or solvents.
Can I wrap upholstered furniture?
It’s not recommended. The adhesive can seep into the fabric, causing staining, and the stretch of the vinyl won’t conform well to the soft surface. Stick to hard‑surface pieces like tables, cabinets, and frames.
How long does the installation take?
A small side table (about 2sqft) can be done in 45 minutes. Larger items like a dining table (30sqft) may require 3‑4hours, especially if you’re perfecting the finish.
Whether you’re looking to give a tired coffee table a fresh, modern vibe or protect a wooden console from spills, car‑wrap vinyl can be a surprisingly effective tool. Just remember: good prep, the right tools, and a little patience go a long way. Happy wrapping!"