Picture this: you’re standing in the middle of your backyard, barefoot in the grass, looking out at a patch of lawn that would make a sheep yawn. You crave a spot to lounge, grill, or invite friends over, but as soon as you Google patios, your jaw nearly drops at those wild price tags. Readymade pavers? Contractors? $4,000 and up for a "simple" slab? No thanks. But here's the thing: you don’t need fancy stones, deep foundations, or a pro crew to give your grass some serious glow-up. With a little sweat and clever shopping, it’s totally possible to create a patio that looks sharp, stays solid, and leaves your wallet surprisingly untouched.
The Budget Patio Basics: What Are Your Options?
When you’re starting with plain grass, you’ve got way more affordable choices than you probably think. Forget digging ten inches down or ordering concrete trucks. Some of the coolest patios come together with nothing more than a truckload of gravel, sand, or some creative use of recycled materials. Gravel patios are the reigning champion for cheapskates—think under $2 per square foot if you play your cards right. Compact some landscape fabric, dump the stones, and you're almost done. Sure, it's not as Instagram-perfect as brick, but it drains well, won’t crack, and requires way less elbow grease. If you love a little upcycling, consider reclaimed bricks, old concrete chunks (urbanite), or even sturdy wood pallets. There’s actually a whole Reddit subculture focused on “urbanite patios” made from busted up sidewalks saved from the landfill.
For the truly barebones approach, you can skip hardscape materials altogether and build a ground-level deck using standard lumber or composite boards. The only catch? Wood will run a bit higher than gravel—usually $3–$6 per square foot if you strip it back to essentials and use pressure-treated planks. Still, it’s way cheaper than pouring a concrete slab and looks sharp in any yard.
And don’t forget about interlocking patio tiles. Amazon is filled with snap-together tiles made of plastic or wood composite. They cost a bit more per square foot, but they go right over short grass or compacted soil, meaning barely any prep work. Depending on your area’s rain and humidity, they might last for years with nothing more than occasional cleaning.
What most people overlook is that you can mix and match these methods. A layer of gravel in the main "hangout" zone, a couple of recycled pallet benches, and some solar lights: you could reimagine your entire outdoor game in a single weekend without breaking $300. Here’s a quick side-by-side:
| Patio Surface | Material Cost/sq ft | Prep Needed | Durability |
|---|---|---|---|
| Gravel | $1.50 - $2.50 | Weed fabric, edge restraint | 10+ years |
| Pallet Wood | $0 (if sourced free) - $3 | Level base, sand/soil | 5–10 years |
| Recycled Brick/Urbanite | $0 - $2 | Sand base, some leveling | 20+ years |
| Snap Tiles | $3 - $7 | Minimal, level grass | 3–10 years |
Don’t just listen to me. According to the American Society of Landscape Architects, "gravel patios are not only budget-friendly, but they blend with nearly every home style while being among the most sustainable hardscape solutions."
"Gravel is a practical, permeable, and surprisingly elegant choice for patios, providing function at a fraction of the cost of conventional methods." —ASLA Design Guide, 2024
Prepping Your Grass: Getting It Right from the Ground Up
So you’ve picked your dream budget surface, but your lawn is more bump than billiard table? Time to prep that ground so your new patio doesn’t turn into an ant farm after the first rain. The main rule: level, then layer. Don’t be tempted to slap your materials down over tall or lumpy grass—it just leads to soggy, uneven patios and headaches that last all summer.
First, mark the area using spray paint, rope, or wooden stakes. You want to overpower the grass—otherwise it’ll sneak back through gaps and keep growing under your feet. Mow everything as short as you can, then dig out at least 2–4 inches of sod. If you want to save the lawn for another corner of your yard, you can roll up the sod in big strips. It’s rough work but totally doable with a flat shovel and patience.
Now, the secret weapon: weed barrier fabric. These woven or nonwoven sheets stop most grass and weeds from poking through, but they let water drain right out. They’re cheap—about $10–$12 for a big roll—and make life way easier down the line. Spread it evenly, overlap by a few inches, and secure it with landscape staples every foot or so.
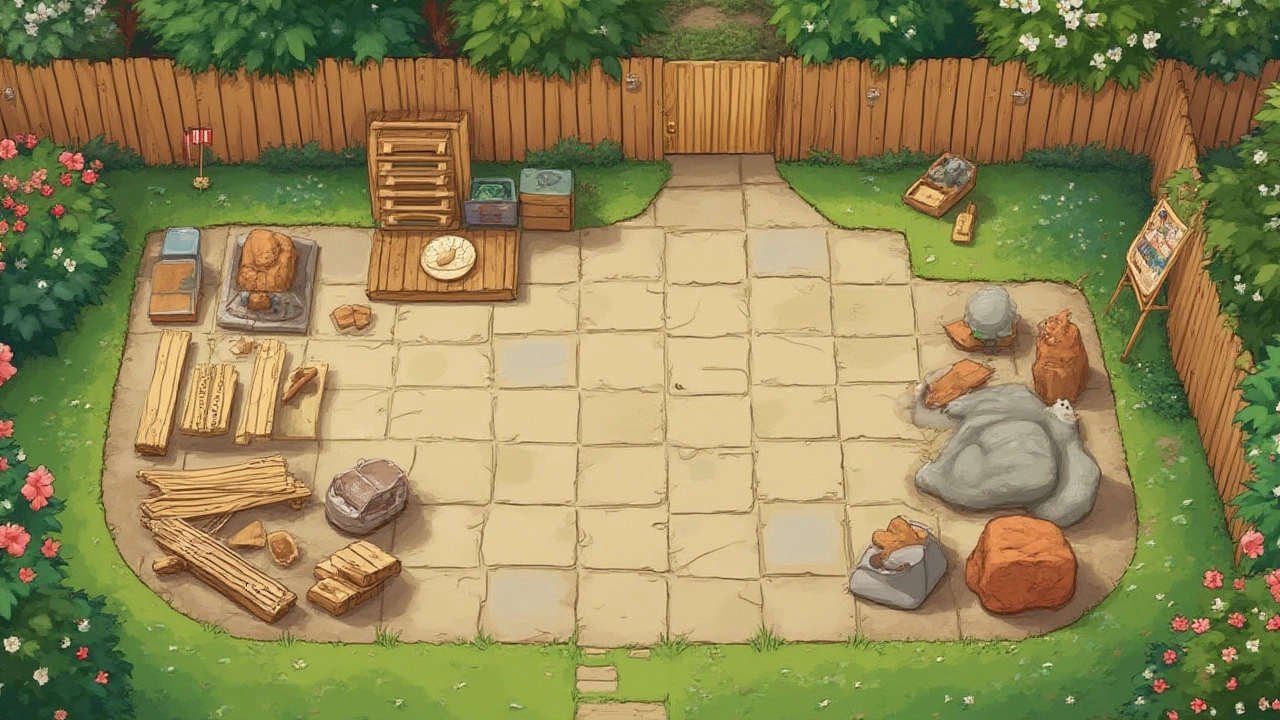
Next comes material specific prep. For gravel, dump 2–3 inches of "crush and run" or pea gravel and rake until it’s flat. For brick or urbanite, toss down 1–2 inches of sand first to help level and lock those wonky pieces in place. For a pallet patio or deck, lay out concrete or paver blocks at key "footing" points so the frame doesn’t rot where it touches the dirt. If you use interlocking tiles, you can get away with less fuss, but it still pays to cut the grass very short and knock down any major bumps with a tamper or shovel.
Good prep work goes a long way. Even the best cheap patio will turn into a swamp or weed jungle if you cut corners on these first steps. Don’t rush this part and you’ll be sipping lemonade out there for years, not pulling dandelions every weekend.
Step-by-Step: Building the Easiest DIY Gravel Patio
This method wins for pure bang for buck and is perfect for almost any climate. Let’s walk through the real steps—no skips, no fluff:
- Mark the Area: Lay out your perfect patio shape using stakes and string or spray paint.
- Remove Sod: Shovel out 2–4 inches of grass and roots. Don’t worry if you’re not laser-precise, just aim for flat and even.
- Level the Ground: Use a metal rake or garden level to even everything out. Grab a $30 hand tamper from the hardware store and press down the earth—it’s oddly satisfying!
- Weed Barrier: Cut and lay weed fabric, overlapping each sheet by at least 3 inches. Nail it down with landscape staples.
- Edge Restraints: Not strictly required, but garden edging (plastic, steel, or even fieldstones) keeps your gravel confined and tidy for years. Push or tap in along the edges.
- Dump the Gravel: Call a local gravel yard for a delivery (usually sold by the cubic yard). Figure about 1–1.5 cubic yards for a 100-square-foot patio at 3-inch depth. Wheelbarrow it in if you need to.
- Rake Smooth: Spread the gravel evenly, aiming for 2–3 inches deep across the whole surface.
- Tamp & Top Off: Go over the surface again with your hand tamper. Add an extra bag or two of gravel if you see any low spots after a rain.
That’s it. No concrete. No drama. In a day or two, you’ve got a pretty slick outdoor space for less than a fancy dinner out. "Cheapest way to make a patio"? Check.
If you want to get fancy, drop in a border of reclaimed bricks or tuck stepping stones into the gravel for visual flair—these extras usually add less than $1 per square foot if you hunt down Craigslist or Facebook Marketplace finds.
Tips, Maintenance, and Upgrades: Make It Last and Look Amazing
Cheap doesn’t have to mean short-lived or shabby. A little strategy goes a long way if you want your patio to stay sharp without sucking up big hours of your weekends. The #1 thing: sweep or rake your gravel every month or so to keep it from compacting unevenly. Anytime you spot weeds poking through, yank them quick or sprinkle a little diluted vinegar solution to knock them back.
For wood pallet patios, keep an eye out for rot or termites. If you score free pallets, double check for markings like "HT" (heat treated) instead of chemicals. Oil or stain them once a year to fight moisture. Snap-together patio tiles can shift over time on soft grass—if you see big gaps, just pop them up, stomp down the dirt underneath, and lay them flat again.
Upgrade ideas? Solar stakes give your outdoor room a cozy glow at night for less than $15. Add a couple of plastic planters filled with flowers or herbs—no need for fancy garden beds. Folding tables and weatherproof chairs are everywhere at thrift stores, and a few bold outdoor rugs will cover up any rough spots or make smaller patios look way more intentional.
Sometimes the best tip is the simplest: "Choose the right materials for your area’s weather," says Mike Holmes, well-known contractor and TV host.
"If you’re going cheap, make sure you’re not wasting your time—little things like weed barrier, proper drainage, and pressure-treated wood all save a ton of headaches long term." —Mike Holmes, Holmes on Homes, 2025
Don’t forget: if you keep your patio under 200 square feet, in most places you won’t even need a permit. Double check local codes, just to be safe, especially if you want to run lights or outlets out there.
And, if you ever outgrow your patio dreams, it’s easy to expand or swap materials later. Start small, start cheap, and see where it takes you. The best spot in your yard is one you actually use, grass stains be damned.